In UC500 two voice system configurations are supported – PBX type and key system type. A typical PBX system comprises of an auto attendant which handles incoming calls from a PSTN line and transfers the caller to one of the internal extensions. Outbound local/International calls are routed out through the PSTN line. Also callers can leave messages on local extensions voicemail boxes if any.
We will take a typical scenario to run through this lesson and understand how to configure dial plan and voicemail parameters on UC500 series devices as illustrated in figure 1.
Figure 1: Topology scenario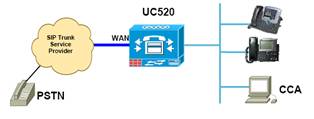
Launch CCA tool and check topology to ensure all devices /connected phones are displayed. Click on the device tab and select the system type as PBX as shown in figure 2 below.
Figure 2: PBX as system type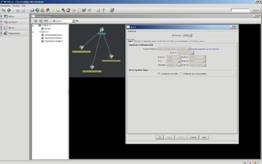
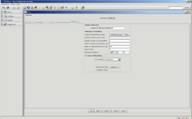
Click on the System tab.
Change the system message to UC520-PODxx.
Configure a system wide speed dial. Click on the Add button and configure a name (such as TAC helpline) and a related number. Don’t forget to include PBX access code and the long distance prefix for the speed dial. These parameters are by default 9 and 1 for North America dialing and can be changed in the dial plan tab. As shown in figure 3. Don’t click OK until all voice tabs are configured.
Figure 3: Dial Plan tab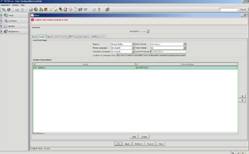
Click on AA & Voicemail tab.
Set the AA access extension as 400 and the AA PSTN number as 4085xx1200.
For the auto attendant script select the aa_transfer.aef
Set the following parameters for the auto attendant script:
Option 0:203
Option 1: 201
Option 2: 202
Option 9: 401
Set the voicemail access extension to 401 and the VM PSTN number to 4085xx1209
The pull down menu gives existing list of extensions in the system or we can configure any number by overwriting none. Figure 4 illustrates AA and voicemail tab settings
Figure 4: AA and voicemail tab settings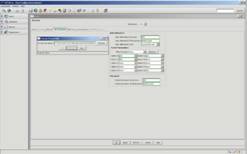
Click the Dial Plan tab.
Ensure the following defaults are set for North America dialing:
Number of digits per extension 3
Number of digits in Area code 3
Number of digits in local number 7
Digits for placing long distance calls 1
Digits for placing international calls 011
Access code 9
Configure the emergency number as 911
For incoming call handling, FXO trunks can be changed from custom configuration to auto attendant or operator. When we select operator we get an option to configure the operator’s extension. For this scenario choose auto attendant from pull down menu as shown in figure 5.
Figure 5: Dial plan tab
Click on Configure button for direct inward dial. We can use this feature to add PSTN DID numbers to 2 of the IP phone users.
Click on Add Range for one to one DID translation
Enter a description such as SIPPSTN
Enter starting DID range as 4085xx1201 and ending range as 4085xx1202
Enter starting internal extension range as 201 and ending with 202
Choose SIP trunk from the trunk pull down
Do not check caller ID and click OK.
Figure 6 shows configuring direct inward dial
Figure 6: Direct inward dial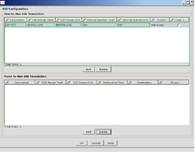
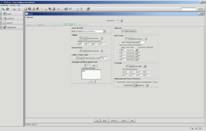
Click on Voice Features tab.
Under the paging parameters check the enable number of paging groups, select 1 and configure the first paging group extension number as 101.
Under the group pickup parameters check the enable number of pickup groups and select 1.
Under the caller ID block code check the enable caller ID block code, use default value.
From the outgoing call block number list enter 1510 and click on Add button. This will block all calls to 510 area code. Long distance prefix need to be specified in front of area code
Check the enable intercom box.
Under the hunt group parameters check the enable number of hunt groups and choose 1. Configure the first pilot# as 501.
Under the call park parameters check the enable number of park slots and select 1 configure the 1st park slot extension as 701.
For the multi party (ad hoc conferencing) change default from 3×8 to 4×4
Figure 7 illustrates voice features tab
Figure 7: voice features tab
Now we will see how to configure auto attendant.
Follow the steps below to setup prompts for auto attendant. There are two ways in which setup prompts, we can either use sound recorder or we can setup prompt management system.
Use the sound recorder tool to record prompts
Click the red record button to start the recording.
After prompts are recorded click on fileà properties and change the audio format.
In the format conversion section, click on convert now.
In the sound selection window scroll up and choose CCITT u-law and click OK.
Ensure that audio format in the properties page reflects CCITT u-law ,8 kHz , 8 bit, mono as shown in figure 8.
Figure 8: using sound recorder for auto attendant prompt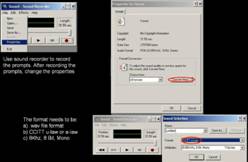
The other way to record prompt for auto attendant script is using prompt management script on CUE. We will have to use CUE web GUI. The configuration steps are broadly classified into three main parts.
Part 1 – configure the call in number for the prompt management script.
Part 2 – assign admin rights to a specific extension.
Part 3- CLI configuration on the UC500.
Configure the call in number (trigger) for the prompt management script – launch web browser and goto http://10.1.10.1
Login using administrator id and password; default is (cisco/cisco)
Click on administrator > call in numbers .
Click Add
Configure the Add a call in number window.
From the application pull down menu select promptmgmt.
Configure the call in number as 402.
Once done click on Add.
Ensure the new call in number appears under administrator > call in numbers .
Assign admin rights to a specific extension – 201.
Click on configure > users.
Click on user aip. A user profile window which displays all the parameters for an ip will pop up. In this window set the PIN number to 789, and click Apply.
Click on groups tab, you will see list contains IMAPgrp. Click on subscribe as member .
In the find window enter administrator for Group ID and click on find. Check the group ID administrators and click on select rows. Ensure aip shows as a member of administrator group and close the user profile window.
Use CLI to configure dial peer for prompt management
Config t
Dial-peer voice 2010 voip
Description dial-peer for prompt management
Destination-pattern 402
B2bua
Session protocol sipv2
Session target ipv4:10.1.10.1
Dtmf-relay sip-notify
Codec g711ulaw
No vad
End
Next step is to record a prompt
Go off hook on any phone and dial 402 to trigger the prompt management script
The script will ask for an extension /pin followed by # user extension 201 and pin 789
Select option 2 to administrator custom prompt
After recording the prompt, press 1 to save the prompt before termination of call
Incase prompt is recorded using sound recorder tool to upload the prompt click on the browse button next to prompt
In case prompt is recorded using prompt management then we first need to refresh the voice window. We can refresh voice window by re-launching voice window or by pressing refresh icon from top left corner. Once the window is refreshed we can select the prompt from the menu prompt pull down menu.
This completes the CCNA Voice article covering configuration of dial plan and voicemail and auto attendant on UC500 series devices.