User tab on CCA tool is used to configure user parameters in UC500 series devices. In this option we can associate users with the phones discovered by CCA tool and add new phones as required. We also have access to the phone configuration screens by choosing more buttons. In the below screen we can change what the phone buttons do, configure user permissions, define paging groups, configure intercom, set timers and operations for busy and no-answer call rules.
The configure user parameter window appears on screen as illustrated in figure 1
Figure 1: user configuration window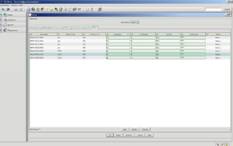
We will use below example to illustrate how to configure user parameters:
For all Analog Phones we configure the following:
- Configuring the lastname for all analog phones as fxs.
- Configure the firstname as a, b, c, d.
- Configure the user-id as afxs, bfxs, cfxs, dfxs.
- Set the password to 1234.
For all IP Phones we configure the following:
- Configuring the lastname for all IP phones as fxs.
- Configure the firstname as a, b, c, d.
- Configure the user-id as aip, bip, cip.
- Set the password to 1234.
Choose the More button for the IP Phones one at a time.
For IP phone with x201
- Select the paging group from the pull down.
- Select the Hunt group from the pull down.
- Set permissions to international. Ensure “Block restricted number” is checked.
- Set the intercom between user aip and bip.
- Ensure the DID number configured earlier shows up – click OK.
For IP phone with x202
- Select the Paging Group from the pull down.
- Select the Hunt Group from the pull down.
- Set permissions domestic. Ensure “Block restricted number” is checked.
- Ensure the DID number configured earlier shows up – click OK.
For the CIPC Phone with x203
- Select the Pickup Group from the pull down.
- Set permissions to domestic. Ensure “Block restricted number” is checked.
- Ensure no PSTN number displays – click OK.
As illustrated in figure 2 below.
Figure 2: setting options

Click OK on the screen. Configuration successfully sent to UC500 series devices will be displayed on screen.
This completes the CCNA Voice lesson on configuring user parameters using CCA tool for UC500 series devices.