Cisco CCNA Making Your Router a TFTP Server
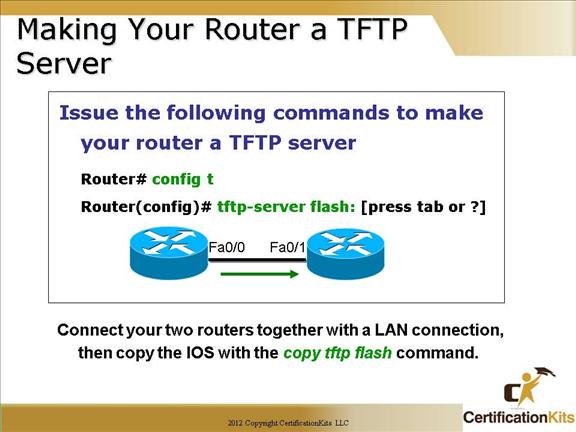
Now this is a great feature of a Cisco router! If you do not have a laptop or other host that can provide TFTP services, you can make a router a TFTP server with the global configuration command “tftp-server flash:”. You will then need to make sure the file (i.e. IOS image) is available on the router you configured as a tftp server. It is as simple as that, you can now copy the image from the router configured as a tftp server allowing upgrade or downgrade of your other router.
Cisco CCNA Dynamic Host Configuration Protocol
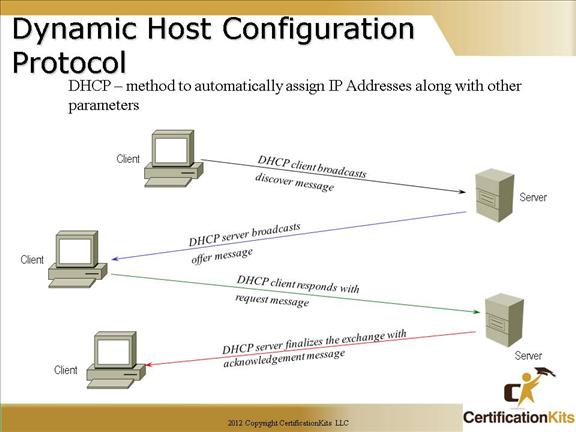
DHCP is used to assign IP addresses automatically and to set TCP/IP stack configuration parameters, such as the subnet mask, default router, and Domain Name System (DNS) servers. DHCP is also used to provide other configuration information as necessary, including the length of time the address has been allocated to the host. DHCP consists of two components: a protocol for delivering host-specific configuration parameters from a DHCP server to a host, and a mechanism for allocating network addresses to hosts.
Using DHCP, a host can obtain an IP address quickly and dynamically. All that is required is a defined range of IP addresses on a DHCP server. As hosts come online, they contact the DHCP server and request address information. The DHCP server selects an address and allocates it to that host. The address is only leased to the host, so the host will periodically contact the DHCP server to extend the lease. This lease mechanism ensures that hosts that have been moved or are switched off for extended periods of time do not hold on to addresses that they do not use. The addresses are returned to the address pool by the DHCP server, to be reallocated as necessary.
Cisco CCNA Making your Router a DHCP Server
This is another great Cisco router feature.
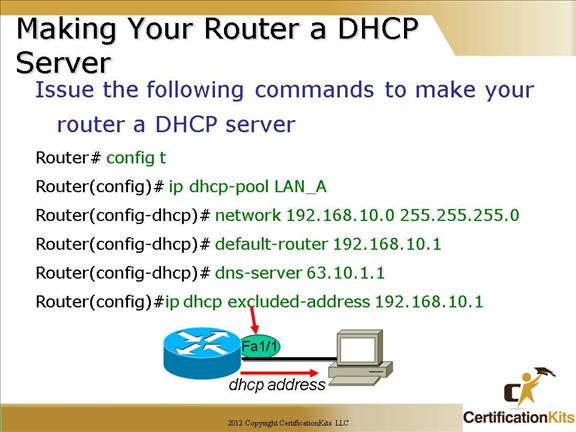
It is important that you understand that the router maps the pool to the interface which has an IP address in the same subnet as the pool.
In the example above, the Fa1/1 interface must be assigned the IP address 192.168.10.1 or the pool will not hand out IP addresses to clients.
Note: The IP address of 192.168.10.1 is excluded from the pool since it is assigned to the router. Additional addresses can be excluded if they are specifically assigned to other devices.
Note: The network, default gateway and DNS server is defined as that information will be passed in the DHCP message to the host requesting to be assigned an address via DHCP.
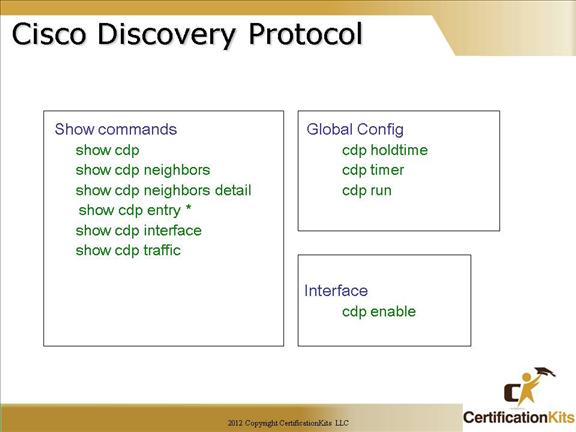
Cisco CCNA Cisco discovery protocol
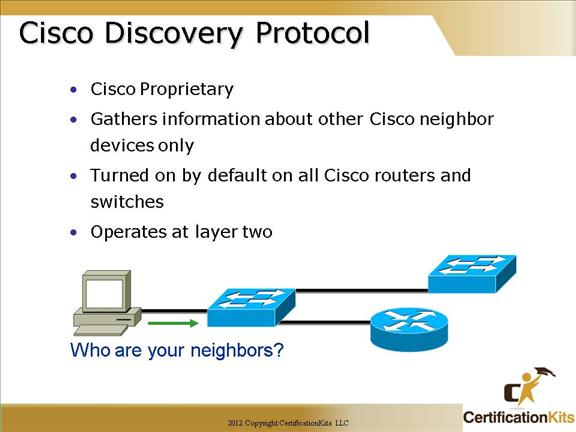
Cisco Discovery Protocol (CDP) is a proprietary protocol designed by Cisco to help administrators collect information about both locally attached and remote devices.
By using CDP, you can gather hardware and protocol information about neighbor devices, regardless of the routed protocols enabled on the interface since it operates at layer 2. This is very useful information for troubleshooting and documenting your Cisco-based networks. CDP is turned on by default on all Cisco routers and switches.
Cisco CCNA Cisco Discovery Protocol
The “show cdp neighbor” command (sh cdp nei for short) delivers information about directly connected devices.
It’s important to remember that CDP packets aren’t passed through a Cisco switch, and that you only see what’s directly attached. So this means that if your a router is connected to a switch, you won’t see any of the devices hooked up to that switch, you will need to get that information from the switch itself.
Another valuable CDP command to get more information about a neighbor is the “show cdp neighbor detail” command (show cdp nei de for short). This command can be run on both routers and switches, and it displays detailed information about each device connected to the device you’re running the command on.
The “show cdp entry *” command is the same as “show cdp nei detail”. However, on a router or switch, type “show cdp entry * ?” and you’ll see there are two helpful subcommands you can use.
Cisco CCNA show cdp neighbours
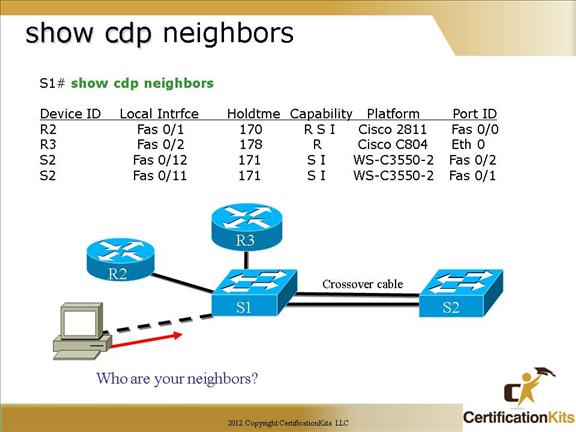
Field Descriptions:
Device ID – The configured ID (name), MAC address, or serial number of the neighbor device.
Local Intrfce – (Local Interface) The protocol being used by the connectivity media.
Holdtime – (Holdtime) The remaining amount of time, in seconds, the current device will hold the CDP advertisement from a transmitting router before discarding it.
Capability – The capability code discovered on the device. This is the type of the device listed in the CDP Neighbors table.
Platform – The product number of the device.
Port ID – The protocol and port number of the device.
Command syntax:
show cdp neighbors
type – (Optional) Type of the interface connected to the neighbors about which you want information.
number – (Optional) Number of the interface connected to the neighbors about which you want information.
detail – (Optional) Displays detailed information about a neighbor (or neighbors) including network address, enabled protocols, hold time, and software version.
Cisco CCNA Using CDP Example

1. You first need to administratively mark up the s0/0 interface on the Vail router so you can receive CDP information
Vail>enable
Vail#config t
Vail(config)#int s0/0
Vail(config-if)#no shutdown
2. You need to find the Keystone routers IP address and set the address of the Vail s0/0 to the next address in the available pool
Vail(config-if)#exit
Vail(config)#exit
Vail#show cdp neighbors detail
3. Once you find the IP address of the Keystone router, configure the Vail interface with the correct IP address – the next available IP address in the pool.
4. Telnet from the Vail router into the Keystone router and verify the configuration. Enable the F0/0 with a no shutdown if needed.
5. Finally, connect to HostB and make sure you can ping the server at 10.1.1.240.
Cisco CCNA Telnet
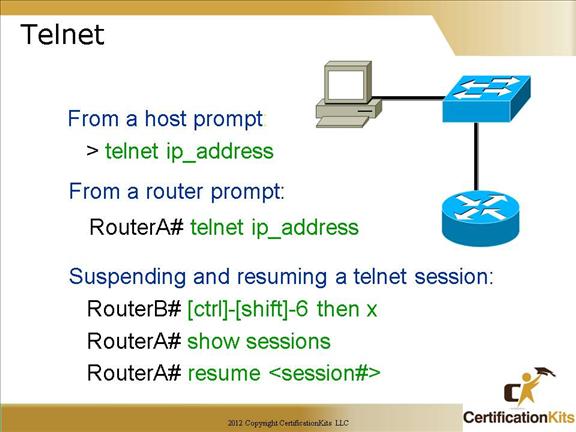
Telnet is a virtual terminal protocol that’s part of the TCP/IP protocol suite that allows you to make connections to remote devices, gather information, and run programs.
After your routers and switches are configured, you can use the Telnet program to reconfigure and/or troubleshoot your routers and switches without using a console cable.
You run the Telnet program by typing telnet from any command prompt (DOS or Cisco).
In order to be able to remotely telnet to your router or switch, you have to have the VTY passwords set. Otherwise, the router or switch will prompt that password is not set, and not permit the remote login.
If you telnet to a router or switch, you can end the connection by typing exit at any time, but what if you want to keep your connection to a remote device but still come back to your original router console?
To do that, you can press the Ctrl+Shift+6 key combination, release it, and then press X.
Another common practice is to telnet and specify a port or socket. This is useful when accessing a device hanging off of a terminal server, or when testing listener ports or firewall access rules.
Router# telnet 10.10.10.10 80
Open
The open indicates the port is listening, and access is not blocked by a firewall or ACL.
Another telnet method is to telnet to the host, and specify a source address. This can be useful when trying to verify routing to a specific subnet or host address on the router. An example would be:
telnet 10.10.10.10 /source-interface Ethernet0/0